 - The KC5LDO Shortwave Receiver -
 |
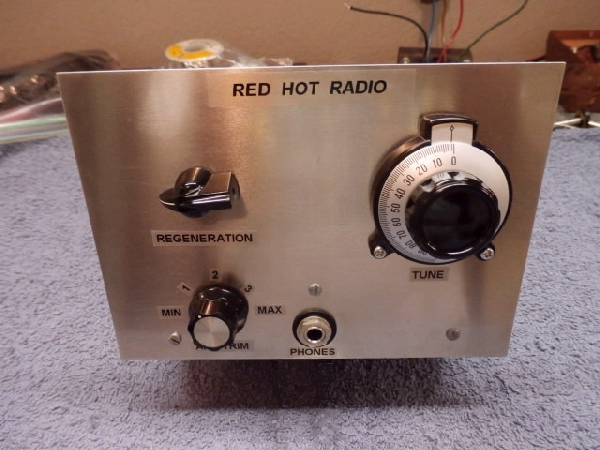
For anyone that enjoys old time radio as I do, this is a must do project. This receiver is a simple one tube regenerative type using minimum parts count and low voltages. Although very simple in design it is an excellent performer. The information for this receiver came from the September 1995 issue of CQ, pg. 48, "Red Hot Radio Returns". I made a few changes to the original circuit that really enhanced performance.
|
|
|
|
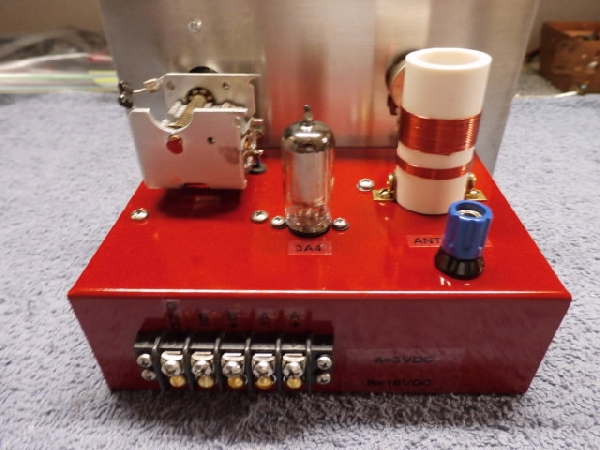
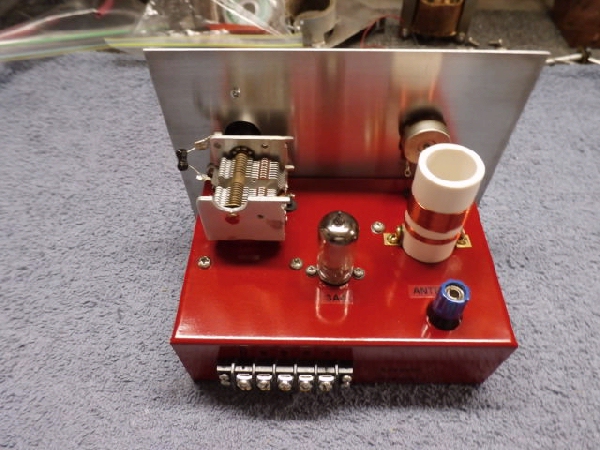
My receiver is built in a 4 x 8 inch aluminum chassis. The front panel is 4 inches high. A vernier drive is required for tuning. This is because moving the capacitor a thousandth of an inch will change the frequency. It is very sensitive and must be tuned slowly. The tuning capacitor should have a value of between 90-100 pf. I used the smaller section of a dual gang capacitor from a 5 tube broadcast set having 9 plates. The pot for regeneration adjustment should be 1,000 ohm.
Coil construction is very important as it greatly affects receiver performance. I used a 1 inch o.d. pill bottle for the form and #22 enamel covered wire. This wire is about .016 of an inch in diameter. Both coils are close wound and wound in the same direction. L2 is 7 turns and I made L1 is 22 turns. Coils should have 1/4 inch spacing between them. L1 will affect frequency coverage. Using 22 turns and the tuning capacitor I used gives me a frequency coverage of 3500 kc to 8200 kc. It is important to keep the coil leads under two inches. Using less turns on L1 would raise the frequency. I am happy with my combination because it covers 80 & 40M ham bands as well as much of the popular shortwave broadcast bands. Copying code with this receiver is easy.
|
|
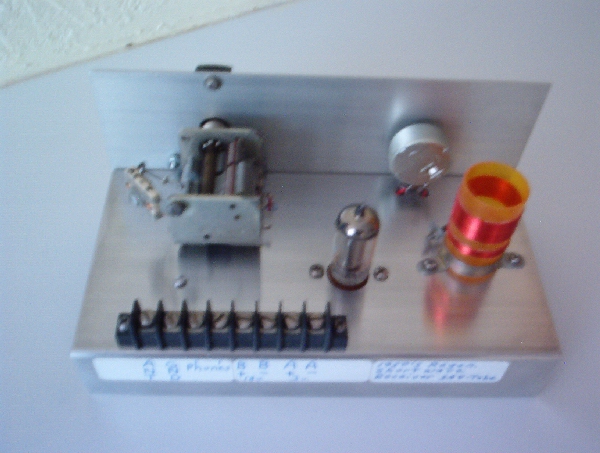 |
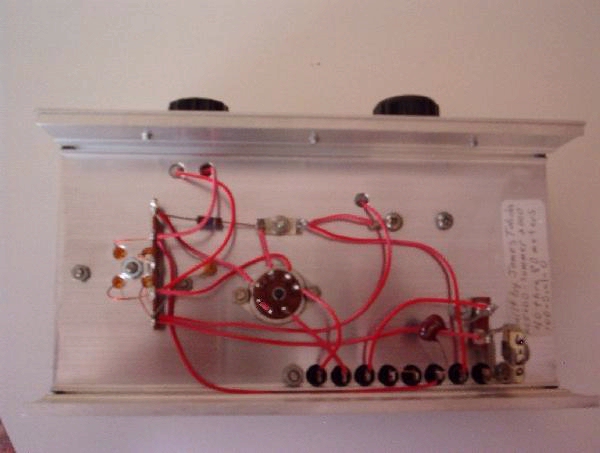
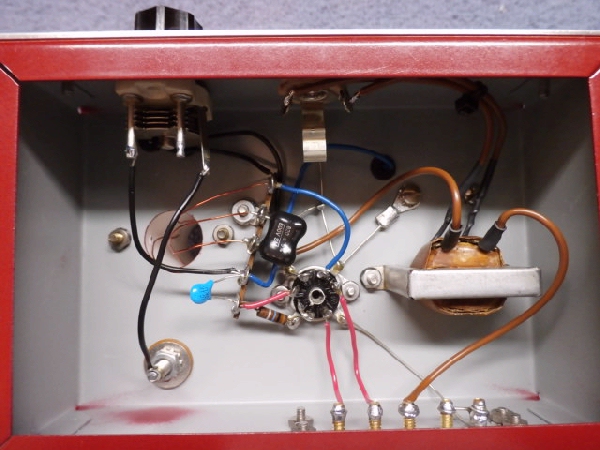
I used a terminal strip to simplify all hook ups for battery, antenna and headphones. High impedance headphones are a must for this circuit. I originally used an old set of 4000 ohm headphones. The set worked well but volume was a bit low for me. I then used an audio transformer that is often found on most speakers of older tube sets. One side of the transformer will give the set the high impedance it needs and the other side will let you use modern 8 ohm headphones. The wire that originally went to the speaker would be the one you hook up to the headphones. The difference was astounding. Clarity and volume both went up. Newer headphones are also more comfortable.
My other modification was adding a 3-30 pf. trimmer capacitor in the antenna feed. This helps tune the antenna to the receiver. Once this adjustment is made, it need not be changed unless change antennas. Simply adjust for maximum signal. I also added a 3-30 pf. trimmer capacitor across the tuning capacitor in parallel. Adjusting this trimmer will shift the frequency range slightly up or down. Once this is set to cover the desired frequency range it need not be readjusted.
Battery voltage for the filament is 3 volts. Two D cells in series will last quite awhile. The B voltage is 18 volts and two nine volt batteries in series also last quite awhile. Increasing the B voltage will not raise volume and only raised the setting of the regeneration control.
When viewed from the bottom, the tube socket pins are numbered clockwise. Pins 1 and 7 have a wider space between them. Quarter watt resistors and low voltage capacitors work great.
|
|
 |
I have used a 40 foot wire for an antenna and also use my 10-40M vertical antenna. The receiver seems to like my vertical better. The set also tunes easier with no earth ground. I suggest not using an earth ground.
|
|
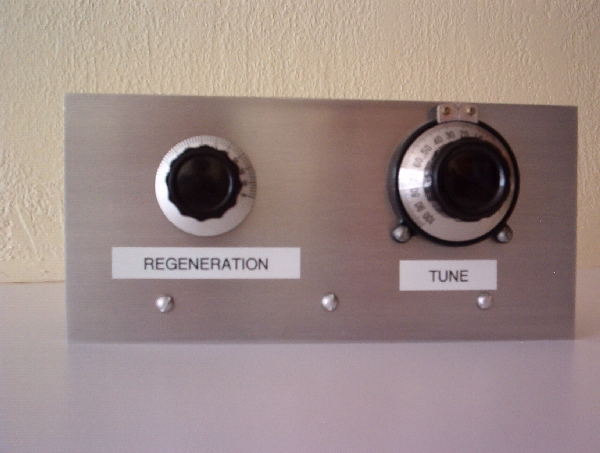 |
Operation is easy, but takes a little getting used to. After making all hooks ups, turn the regeneration control until you hear a click. Just before this click is the most sensitive spot. Start turning slowly at this time. Once you start to hear a signal, turn the regeneration control slowly one way or the other till the signal is clear. This takes a little patience if you have never done this before. Whenever you change frequencies, you will have to touch up the regeneration. Body capacitance will affect all settings, so be sure you are not touching the metal chassis when tuning. It is amazing how well 1950's technology works in today's times. I have spent many hours enjoying this radio.
73, James Tobola - KC5LDO
|
|
 |
|
|
 |
|
|
 |
|
|
 |


